Form & Technique
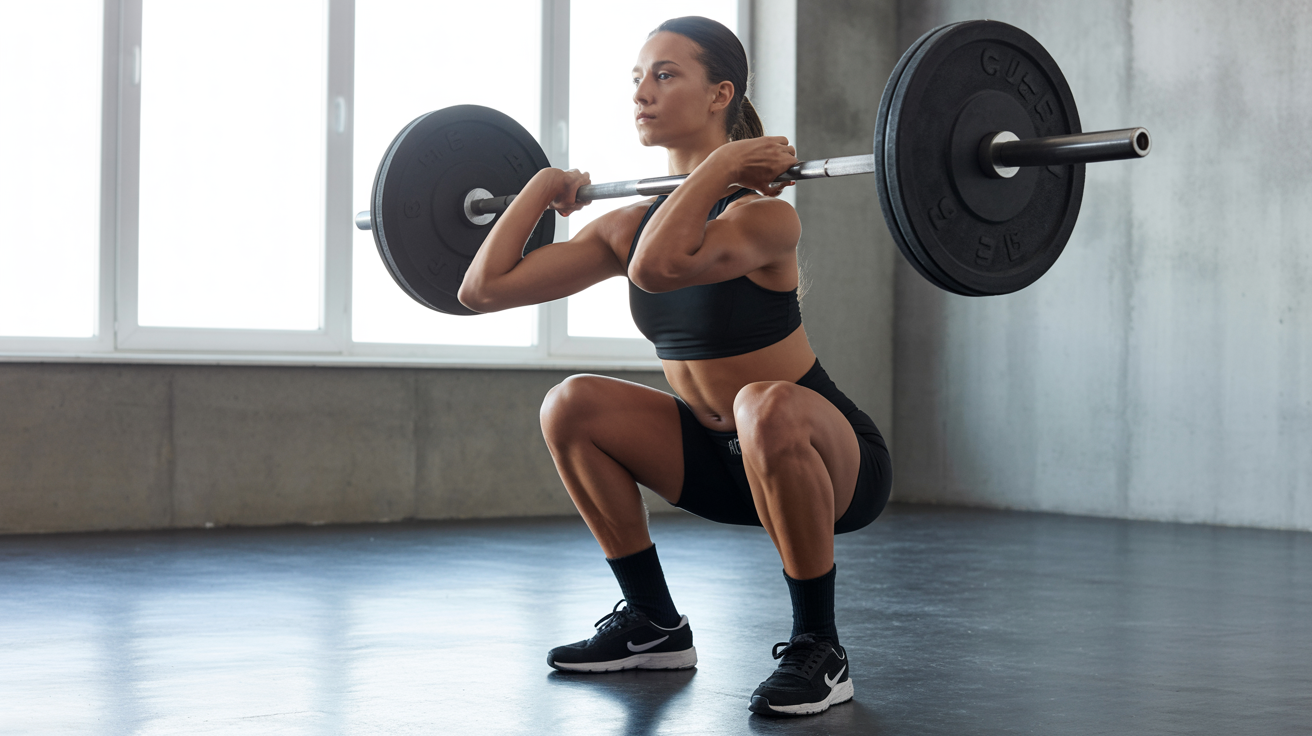
How to Squat With Proper Form: A Beginner's Guide
Learn how to squat properly with step-by-step technique, common mistakes to avoid, and a safe bodyweight-to-barbell progression for beginners.
The squat is the most fundamental lower-body movement you will ever train. Get the form right before you add weight, and you build a foundation that pays off for years. Rush it, and you are likely to stall early or strain something that takes weeks to heal.
This guide covers everything a beginner needs: stance setup, bracing, depth, common errors, and a sensible path from bodyweight to barbell. If you have any history of knee, hip, or lower-back problems, get medical clearance before you start.
Before You Begin: Mobility Check
Most beginners discover their squat is limited not by strength, but by stiffness. Two quick checks tell you where you stand.
Ankle Dorsiflexion
Stand about six inches from a wall, keep your heel flat, and push your knee toward the wall. If your knee can touch the wall without your heel lifting, you have enough ankle mobility for a solid squat. If the heel pops up, spend five minutes per day doing ankle circles and calf stretches before your sessions.
Hip Flexor and Thoracic Mobility
Sit with crossed legs and lean forward. Tight hip flexors restrict how deep you can descend while keeping your torso upright. A stiff mid-back makes it hard to keep your chest up under load. Couch stretches and thoracic rotations are the two most time-efficient fixes while you are learning the movement.
You do not need perfect mobility on day one. You need enough to hit parallel with a neutral spine. Most people get there within a few weeks of consistent warm-up work.
Proper Squat Technique: Step-by-Step
Master each step with bodyweight before progressing to a goblet squat or barbell. Rushing past the bodyweight stage is one of the most common beginner mistakes.
Stance Setup
- Stand with your feet roughly shoulder-width apart.
- Point your toes out between 15 and 30 degrees (not straight ahead, not pointing to 10 and 2 o'clock).
- Your weight should be distributed across your whole foot, not rocked forward onto your toes.
- Look for a neutral, relaxed position where your hips feel open and balanced. Foot width and toe angle vary between people because hip socket depth and rotation differ. Experiment within the range above to find what lets you squat deepest with a flat back.
Brace and Create Tension
This step is often skipped entirely, and it is the single biggest reason beginners hurt themselves when they add load.
- Take a big breath into your belly, not your chest.
- Hold that breath and brace your core as if you are about to take a punch to the stomach.
- Squeeze your glutes slightly and "screw" your feet into the floor (imagine rotating your feet outward without actually moving them). This creates tension through your hips and prevents knees from caving.
- Keep your chest tall and your gaze forward, roughly 6 to 10 feet in front of you on the floor.
This pressurized position is called the Valsalva maneuver. It protects your spine. For bodyweight squats you can breathe normally, but practice the brace so it becomes automatic before you load the bar.
The Descent
- Initiate the movement by pushing your knees out and sitting back slightly, as if finding a chair behind you.
- Lower at a controlled pace (2 to 3 seconds down) rather than dropping fast.
- Keep your knees tracking over your toes throughout. They should not drift inward.
- Let your hips descend between your knees as you go deeper, not behind them.
- Your torso will lean forward slightly. This is normal. The goal is to keep your spine neutral (a natural arch in the lower back, not rounded or hyperextended) rather than forcing an upright torso at the cost of heel rise.
Depth
For most beginners, aim to squat until your hip crease is at or just below the level of your knee (parallel depth). Squatting high (stopping before parallel) shortchanges the glutes and quads; it also tends to load the knees at a poor angle relative to muscle activation.
If you cannot reach parallel while keeping your heels down and your chest up, the limiting factor is mobility. Reduce the range temporarily and work on ankle and hip flexibility.
The Drive Up
- Push through your full foot, emphasizing the heel and mid-foot.
- Think "push the floor away" rather than "stand up."
- Drive your knees out and squeeze your glutes as you rise.
- Keep your chest up. Do not let your hips shoot back and your torso collapse forward into what coaches call a "good morning" (this is a common fault covered below).
- Exhale at the top or just past the sticking point.
- Lockout at the top with hips fully extended and glutes engaged. Do not hyperextend your lower back.
Key Cues to Memorize
A few short mental cues produce a better squat faster than a checklist.
- Heels down. If your heels rise, the weight shifts onto your toes and your knees shoot forward under load.
- Knees track over toes. On the way down and up, your knee should travel in the direction your toes point. Knees collapsing inward (valgus) is a force leak and a recipe for knee pain over time.
- Chest up, neutral spine. A rounded lower back under load compresses the lumbar discs. Stay tall through your torso without forcing an exaggerated arch.
- Sit between your legs, not behind them. Beginners often sit back too aggressively, which shifts the load to the hamstrings and limits depth. Let the hips drop between the knees.
Common Mistakes and How to Fix Them
| Mistake | What It Looks Like | Fix |
|---|---|---|
| Knees caving inward | Knees dive toward each other at the bottom or on the way up | Cue "screw feet out," add light band above knees for feedback |
| Good morning lean | Hips shoot up first, torso nearly parallel to floor | Slow down, cue "chest up," check quad strength with front squats or goblet squats |
| Heel rise | Heels lift at depth | Daily ankle dorsiflexion stretches, temporarily elevate heels on small plates |
| Half-rep depth | Stopping well above parallel | Lower the weight, film yourself from the side to verify depth |
| Forward knee travel only | Knees push far forward with no hip hinge | Cue "sit back slightly" at the start of each rep |
| Holding breath past lockout | Breath held for multiple reps | Exhale at the top, inhale before the next descent |
If a knee or lower back gives you a sharp, acute pain at any point, stop immediately. Dull muscle burn is normal; joint pain is not. See a sports medicine physician or physical therapist before continuing.
Bodyweight-to-Barbell Progression
There is no minimum timeframe for this progression. Some people move through it in two weeks; others need two months. Advance when your current level feels controlled and painless.
Stage 1: Bodyweight Squat
Three sets of 10 to 15 reps. Focus entirely on stance, brace, depth, and knee tracking. Film yourself from the front and side. Ask a coach or experienced lifter to watch at least once before you add external load.
Stage 2: Goblet Squat
Hold a single dumbbell or kettlebell at your chest with both hands. The counterbalance helps beginners sit more upright, making it easier to hit depth and feel what a braced core should feel like. Three sets of 8 to 12 reps with a weight that challenges you without breaking your form.
Stage 3: Barbell Back Squat (Light)
Start with an empty barbell (20 kg / 45 lb). Do not add plates until you can perform three sets of five with a neutral spine, proper depth, and knees tracking correctly under the empty bar. The bar alone is a coaching tool, not an insult to your strength. Once your form is solid, add weight in small increments: 2.5 kg (5 lb) per side per session is a sustainable rate for a true beginner.
Learning to deadlift safely alongside your squat training reinforces the hip-hinge pattern and builds posterior chain strength that supports your squat. Similarly, upper-body pulling work pairs well with your lower-body sessions; see the guide on how to bench press with good form for programming context.
Programming the Squat for Beginners
Squat two to three times per week on non-consecutive days. Beginners recover quickly and benefit from frequent practice of the movement pattern. A simple starting structure:
- Warm-up: 5 minutes of hip circles, ankle circles, and bodyweight squats (10 reps)
- Working sets: 3 sets of 5 reps (barbell) or 3 sets of 10 reps (goblet squat)
- Add weight only when all reps are clean. One missed-depth rep or one caved-knee rep means the weight stays the same next session.
As you build confidence with the squat, complementary pressing movements like the overhead press round out a balanced full-body program.
Frequently Asked Questions
How deep should a squat be for beginners?
Aim for parallel: hip crease level with the top of the knee. Going deeper (below parallel) is fine if your mobility allows and your spine stays neutral. Stopping short of parallel consistently means leaving muscle activation on the table and potentially stressing the knee at a suboptimal angle. Depth is a mobility and technique goal, not a matter of working up to it with heavier weight.
Should my knees go over my toes when I squat?
Yes. Knees-forward-of-toes is normal and necessary in a full squat. The outdated cue to "never let knees pass toes" was meant to prevent extreme forward knee travel, not forward travel altogether. The actual concern is that your heels stay down and your knees track in line with your toes rather than caving inward. If you keep your heels flat, the knee position tends to take care of itself.
Why do my heels come up when I squat?
Heel rise almost always points to restricted ankle dorsiflexion or tight calves. Daily stretching (calf raises with a slow lowering phase, ankle circles, and wall ankle stretches) fixes this for most people within two to four weeks. In the meantime, you can place small weight plates under your heels as a temporary workaround while you build mobility.
How much weight should a beginner squat?
Start with bodyweight. Then a goblet squat with whatever dumbbell lets you squat to depth cleanly. Then an empty barbell. Add weight only when your form is consistent and comfortable across all reps in all sets. "Beginner numbers" vary enormously depending on body size, age, and prior athletic background. Comparing your early numbers to anyone else's is a distraction.
How do I know if my squat form is good?
The most reliable check is video feedback. Film yourself from the side and from the front. Look for: heels flat throughout, knees tracking over toes, depth at or below parallel, and a neutral spine (no rounding in the lower back, no extreme forward lean). If you have access to a certified strength coach or personal trainer for even a single session, use it. A trained eye catches compensations that are invisible to the person making them.